Tuesday, January 25, 2011

JDeveloper and SOA Composite Editor Installation

Now that your servers are installed, let's install JDeveloper and the JDeveloper extension for SOA Composite Editor.

Installing Jdeveloper
After installing the servers, you can install the JDeveloper IDE.

If you are installing JDeveloper on a machine that is not the same as your WebLogic server installation, you must have installed the JDK 6 update 11 first. See the pre-requisites section for download location.

Double click on .exe file of Jdeveloper download.Click on Next on Welcome screen.


Choose Middleware Home Directory: select Create a new Middleware Home and enter D:\Oracle\Middleware. If you enter something else, then adjust accordingly when D:\Oracle\Middleware is referenced.Click on Next.


Choose Install Type as Complete, and then click on Next.


Click on Next.


Confirm Product Installation Directories. You should see:
- Middleware Home Directory: D:\Oracle\Middleware
- JDeveloper and ADF: D:\Oracle\Middleware\JDeveloper
- WebLogic Server: D:\Oracle\Middleware\wlserver_10.3

Click on Next.

Review Installation Summary.Click on Next.


Installation will start ad it will take few minutes to Install.


When installation completes, deselect Run Quickstart and click on Done.


Configuring Weblogic Server Domain

From the Oracle Home location, you configure the WebLogic server domain for the SOA and BAM servers.

Go to the location where config.cmd is located and then double click on it.

D:\Oracle\Middleware\Oracle_SOA1\common\bin\config.cmd

When the configuration wizard's Welcome screen comes up, select Create a new WebLogic domain and then click on Next.


Select Generate a domain and select SOA Suite, Enterprise Manager, and Business Activity Monitoring. Dependent products are selected automatically.Click on Next.
Enter the domain name: domain1.Click on Next.


Enter the user name as weblogic and a password. The password welcome1 is assumed here but you should choose your own secure password and remember it for later whenever the password is referenced.Click on Next.


Select the Sun SDK 1.6_11 and leave Development Mode checked.Click on Next.
On the Configure JDBC Component Schema screen, you select the components that you want to change,and then enter the property value for those components. First, select all of the components and enter welcome1 for the password in the Schema Password field.

With all of the checkboxes selected, enter the Service, Host, and Port values.

Now, look at the table. Review the Schema Owner column and confirm that the values are the same as what you configured in the Configure Schema section when you ran the RCU.Go back and review the screenshots in that section of this document for the schema owners if you do not remember them.

Complete the following if the schema owners need to be updated:
i. Deselect all the component checkboxes.
ii. Select BAM Schema only.
iii. Enter the Schema Owner for BAM.
iv. Next, deselect BAM Schema and select the next one.
v. Enter the schema owners one-by-one.
vi. Continue until all schema owners are entered.
Click On Next.

Click on Next without selecting any Option.
Click on Next once more, accepting defaults (no optional configurations), and you reach the Configuration Summary screen.Click on Create.

Wait for the creation to finish—it takes just a minute. Click on Done.

Configuring Database Schema – BAM and SOA Servers

Now we are going to create the database schema for the BAM and SOA servers.

Go to the location in the “Repository Creation Utility” downloaded and extracted file where “rcu.bat” file is located.

D:\BEA\Repository_Creation_Utility\ofm_rcu_win32_11.1.1.2.1_disk1_1of1\rcuHome\BIN\rcu.bat

Double click on rcu.bat file.

Click on Next.


Select the “Create” option and Click on Next.


Give the details regarding Database Connection like “Database Type”,”Host Name”,”Port”,”Service Name”,”Username”,”Password”,”Role” and click on Next.


Select the components needed for e.g. I have selected everything except Enterprise Content Management,Weblogic Communication Services,Webcenter Suite and Portal and BI.Click on Next.


Click on Ignore.

Give Schema passwords.I have given same password for all schemas so that it will be easy to remember.Click on Next.

Click on Next…It will automatically map the tablespaces.It will take some time to check tablespace requirements as well as in creating tablespaces.


When the pre-requisites for this step are completed, click on OK. Click on Create to create the tablespaces. This takes about two minutes.


Weblogic 10.3.0.2 Admin Server Installation

Weblogic 10.3.0.2 Admin Server and Managed Servers Installation

Pre-requisites :-
Installation of Oracle Database 11g (11.1.0.7.0) please refer my another blog :-
http://oradatabase.blogspot.com

Checking your JDK
If you are going to install WebLogic server and JDeveloper on the same machine, you will use the JDK from WebLogic for JDeveloper too. However, if you are going to install on two machines, you need Java 1.6 update 11 JDK for JDeveloper.

JDK 1.6 update 11—from the Sun downloads page: http://java.sun.com/products/archive/
You must use Java 1.6 update 11. Update 12 does not work.

Installing Weblogic Server
To Install weblogic go to the location where we have extracted the weblogic software and double click on .exe file.


After sometime welcome page will appear. Click on Next.

Select “Create a new Middleware home” option and also give the location of Middleware Home Directory wherever the sufficient space is available.Click on Next.

Uncheck the “I wish to receive updates via My Oracle Support” and click on Next.

Select the “Typical” option and click on Next.

Leave as it is whatever Installer has taken and click on Next.


Choose first option “All Users” Start Menu Folder option and click on Next.


Click on Next.

Click on Next and the Installation will start.

Click on “Done” after getting this console.

Monday, January 24, 2011

SOA Minimal Architecture

I know that very less people have heard about SOA Minimal Architecture term,but this is the architecture which is the beginning stage of creating SOA architecture for any business model. In reality,it takes some time to complete the SOA reference architecture (if architecture is ever really finished).

It is not important to have everything before you start or to have complete models,documentations,standards,and governance in place before allowing the first service to be designed and built. But, it is better or important to have an idea of what you are doing.

It is important to have a high-level vision of the architecture in terms of the service hierarchy,service inventory,and semantic information model,before you create very many services.

I would recommend to create SOA minimum architecture. This is the minimum architecture that determines the few things that absolutely must be standardized in order to meet the enterprise goals and clearly specifies them.

Then,it helps to put an architectural vision in place for how the rest of the architecture might be defined,and a process for continual,incremental enhancement and improvement of the architecture.

For enterprise SOA,those crucial things are the service definitions,service inventory,and semantic information model.

The minimum architecture should contain:-
What kind of service is — Types and granularities of services. For example, business, domain, utility, integration external,and foundation services.

Required interfaces and functions — Interfaces or other functions that services are required to use or support. For example, all services must support the management interface and use the logging service.

Technical infrastructure — What technology services use to communicate.For example, Web Services conforming to the WS-I Basic Profile v1.1 and Security Profile v1.0.

High-level semantic information model — Identify the major enterprise business entities and documents required. What information do they need in common to meet enterprise goals? What information needs to be shared between services? For example, a consolidated customer entity supports the business goal of having a single customer view.

Initial service inventory — Identify the major service groups and services needed to support enterprise goals and processes. Determine an organizational structure (such as line-of-business or functional domain).Integrate appropriate industry standards or patterns.

High-level business model— Identify the major enterprise business processes and the common processes that occur across enterprise domains. Identify the underlying capabilities needed to support those processes.

Service identification, specification, and design process — This describes how the architecture and enterprise context fit into and support the development process.

Architecture life cycle process — A feedback mechanism for the constant updating and enhancement of the architecture.

Roadmap — The roadmap addresses at least two areas. The first is a rough priority order of service implementation based on dependencies,commonality, and usefulness. This doesn't specify a timeline, nor take into account other business drivers, but it provides an initial vision for building out the service inventory. The second is a high-level plan for building out the architecture.

In my opinion the minimum architecture should take between 4 and 8 weeks to produce,depending on the size and complexity of the enterprise,and the experience,capability and number of architects.

SOA Reference Architecture

SOA reference architecture definition to support the following goals:
- Provide a common language for services and SOA.
- Provide consistency of implementation, business purpose, and semantics across services.
- Provide an architectural-based design methodology.
- Support SOA governance.
- Support Enterprise Architecture.
- Define how the reference architecture is used.

Components of the SOA reference architecture includes :-
1. Service Metamodel
Defines the concepts, characteristics, and details of a service and how services relate to other parts of the architecture.

Specifically, this defines the service types (business, domain, utility,integration, external, and foundation), the service dimensions, and how these concepts are represented and manifest themselves in a service definition.

2. EA Perspectives— Comprise of the following standard Enterprise Architecture domains : -
Business Metamodel :—
- Defines the concepts used to describe the business architecture.

- Defines the relationship of traditional business architecture concepts (strategy, goals, outcomes, organization,value chain, contexts, and processes) to service-oriented systems.

Information Metamodel :
- Defines the concepts used to characterize the information architecture such as semantic, domain, and physical data.

-Defines the relationship between traditional information architecture concepts and service-oriented systems.

Application Metamodel :—
- Defines the concepts used to characterize the application architecture.

- Defines the relationship between traditional application architecture concepts and service-oriented systems.

For example, it describes how services are used in an n-tier architecture.

Technology Metamodel :
- Defines the concepts used to characterize the technical architecture.

- Defines the relationship between technical architecture concepts and service-oriented systems.
For example, how specific platforms and networks support service SLAs for quality of service.

MBD Perspectives :—
- Support model-based development approaches with specific profiles.

- MBD profiles are related to architectural metamodels, but provide a mechanism to embed the metamodel into a standard modeling and generation tool.


Business Profile :
- Defines the concepts used to describe the business problem in nontechnical terms.
- Defines the relationships among concepts, rules, and constraints.


Application Profile :
- Defines the logical structure of applications,typically in terms of layers, tiers, and architectural elements.
- Defines where and how services fit into the overall application structure.

Platform Profiles :
- Defines the details of the technology platform that will be used for implementation.
- There will typically be multiple different platform metamodels to support different technologies, such as .NET, Java,ESB, and so on.

Transformations :
- Defines how concepts in one model are transformed into concepts in another model and the traceability between model elements.

3. Process Metamodel —
- Defines a process for the design and implementation of services, starting at the business level, moving through service design, to platform-specific implementation.
- Defines the overall workflow, the goals and concerns of each step in the process, the inputs,the metamodel elements involved in each step, the work products produced,and the metrics.

4. Governance Metamodel —
- Defines the fundamental concepts of governance, what metamodel elements they apply to, relationships and constraints, and the interaction of governance with the rest of the reference architecture at design and run time.

5. Architectural Relationships Model—
- Defines the relationships among all the different aspects of the reference architecture, and the relationships with other common architectural frameworks such as EA and software architecture.

6. Architectural Usage Model —
- This describes how to use the reference Architecture.

What is SOA?

You can get definition of SOA at many places but that is not only sufficient to understand the meaning or purpose of using SOA.For make this easy to understand I am going to take a different approach.

I will start with a little story that makes us understand what did and didn't worked in past. Back in 1995, a major bank was trying to solve a problem with customer service.At that time different type of products(like different types of accounts) were implemented on different types of mainframe machines.So,if a customer want information on his two different types of accounts then it was hectic for both customer and customer service representative because for customer it was not so easy to remember the account numbers for different types of accounts and as far as customer service representative(CSR) is concerned,he has to go to two different terminals(containing green signals) to find the information about two different types of accounts. Each terminal was having different kind of interface and the CSR has to remember lot of commands which needs lot of training.Because of this Customer satisfaction with problem resolution was low,employee satisfaction was low, and retention of both was problematic. To solve these problems, first bank used the 3270 emulators to rationalize the interface of all systems into a consistent interface,on a single terminal.This solution only reduces the number of terminals but not the complexity of interfaces.Finally bank thought of using distributing technology called CORBA(Common Object Request Broker Architecture).

The first thing they did with this technology was to created distributed objects to represent different types of accounts.These objects provided an abstraction layer between the user and the mainframe systems.Next, they wrote a new user interface, using Visual Basic (VB), that provided account information to the customer service representatives by accessing the different systems via the CORBA objects.

Then they started replacing the green screen terminals and understood the potential of approach.They had essentially implemented the beginnings of a 3-tiered application architecture by separating the presentation, business logic, and operational systems.

They had essentiallyimplemented the beginnings of a 3-tiered application architecture by separating the presentation, business logic, and operational systems. Next, they wrote a new user interface, using Visual Basic (VB), that provided account information to the customer service representatives by accessing the different systems via the CORBA objects.


The next enhancement they did was implemented customer relationship object.This helped CSR in searching the information about all types of accounts of customer by just taking the customer name and an account number.And the customer also need not have to remember many account numbers.

The next incremental improvement was to automatically look up information about each account and display a summary on the customer service representative’s terminal.Now,without any additional effort on their part,the representatives had a broader view of the customers and a better understanding of their relationship to the bank. This allowed them to better serve the customers requests and at the same time offer additional value or services (i.e., turn a customer support scenario into a sales opportunity).Customer and employee satisfaction started to go up.
Over next 2 years bank continued to add more business objects in logical tier and better features in the interface.After some time everybody started asking for Internet banking.Most of the banks started looking towards the solutions like screen scraping.But this bank investes in architectural approach and they have separated the presentation layer from logical layer and logical layer from operational layer.Finally they invested in building up an effective library of services in the logic layer. Therefore, all they had to do was implement a new Internet presentation.Some minor changes to services were required as well as some new services to support security and other Internet specifics.

After two years,this bank merged with another bank.Now the problem was how to integrate the new bank’s systems into the other bank’s Internet operations.Imagine the challenges involved, and imagine the surprise when 100% of the combined customers were able to access their accounts through the Internet on the first official day of merged operations.It became possible because instead of adding a new presentation,the bank added new systems to the operational layer and enhanced the logic layer so that it was possible to access the new types of accounts and systems. Only very minor changes were required in the presentation layer.

Two things that came out of it was :-
1) Adoption of an architecture that distributed responsibilities across layers and tiers.
2) Understood the challenge of creating the right kind of services in the logic tier and of having developers reuse them.

So, with a successful implementation of SOA, the bank was able to improve customer retention and satisfaction, reduce costs and time to market, take advantage of disruptive technologies, quickly absorb acquisitions, and keep ahead of their competitors.

From a more technical point of view, the bank was able to integrate multiple systems, support multiple channels and devices, scale horizontally to support very large-scale and highly reliable requirements, incrementally add new functionality, manage reuse, and converge on a common service infrastructure.

So,now what is SOA ?

---------------------

SOA isn’t about technology, and SOA doesn’t just happen. SOA is an architectural approach to building systems that requires an investment in architecture and IT, a strategic and business vision,engineering discipline and governance, and a supporting organizational structure.

Tuesday, November 3, 2009

GoldenGate Architecture

Overview of GoldenGate Components Continued

5) Extract Files :-

- When you want to do processing a one-time run,such as an initial load or a batch run that synchronizes transactional changes,GoldenGate stores the extracted changes in an extract file instead of a trail.
- The extract file mostly is a single file but can be configured to split into multiple files in anticipation of limitations on the size of a file that are imposed by the operating system. In this sense,it is similar to a trail,except that checkpoints are not recorded.
- The file or files are created automatically during the run.Versioning features that apply to trails also apply to extract files.

6) Checkpoints :-

- Checkpoints store the current read and write positions of a process to disk for recovery purposes.Checkpoints ensure that database changes marked for synchronization are extracted by Extract and replicated by Replicat to prevent redundant processing.
- They provide fault tolerance by preventing the loss of data when the system,the network,or a GoldenGate process need to be restarted.For advanced synchronization configurations, checkpoints enable multiple Extract or Replicat processes to read from the same set of trails.
- The read checkpoint of a process is always synchronized with the write checkpoint.Thus,if GoldenGate needs to re-read something that it already sent to the target system (for example,after a process failure) checkpoints enable accurate recovery to the point where a new transaction starts, and GoldenGate can resume processing.
- Checkpoints work with inter-process acknowledgments to prevent messages from being lost in the network.Extract creates checkpoints for its positions in the data source and in the trail. Replicat creates checkpoints for its position in the trail.
- A checkpoint system is used for Extract and Replicat processes that operate continuously,but it is not required for Extract and Replicat processes that run in batch mode. A batch process can be re-run from its start point, whereas continuous processing requires the support for planned or unplanned interruptions that is provided by checkpoints.
- Checkpoint information is maintained in checkpoint files within the dirchk sub-directory of the GoldenGate directory. Optionally,Replicat’s checkpoints can be maintained in a checkpoint table within the target database,in addition to a standard checkpoint file.

7) Manager :-

- Manager is the control process of GoldenGate. Manager must be running on each system in the GoldenGate configuration before Extract or Replicat can be started, and Manager must remain running while those processes are running so that resource management functions are performed.

Manager performs the following functions:
- Monitor and restart GoldenGate processes.
- Issue threshold reports, for example when throughput slows down or when synchronization latency increases.
- Maintain trail files and logs.
- Allocate data storage space.
- Report errors and events.
- Receive and route user requests from the user interface.

One Manager process can control many Extract or Replicat processes. On Windows systems, Manager can run as a service.

8) Collector :-

- Collector is a process that runs in the background on the target system. Collector receives extracted database changes that are sent across the TCP/IP network, and it writes them to a trail or extract file.
- Manager starts Collector automatically when a network connection is required. When Manager starts Collector, the process is known as a dynamic Collector, and GoldenGate users generally do not interact with it. However, you can run Collector manually. This is known as a static Collector.
- Not all GoldenGate configurations use a Collector process.When a dynamic Collector is used, it can receive information from only one Extract process,so there must be a dynamic Collector for each Extract that you use. When a static Collector is used, several Extract processes can share one Collector. However, a one-to-one ratio is optimal.
- The Collector process terminates when the associated Extract process terminates.By default, Extract initiates TCP/IP connections from the source system to Collector on the target, but GoldenGate can be configured so that Collector initiates connections from the target. Initiating connections from the target might be required if, for example, the target is in a trusted network zone, but the source is in a less trusted zone.

GoldeGate Architecture


Components of GoldenGate :-

1) Extract Process :-

- Extract process runs on Source system and is the Capturing mechanism of Goldengate.It captures all the changes that are made to the objects for which it is configured for synchronization.
- It sends only the data from commited transactions to the trail for propogation to the target system.
- When extract captures the commit record of a transaction,all the log records for that transaction are written to the trail as a sequentially organized transaction unit. This maintains both speed and data integrity.
- Multiple Extract processes can operate on different objects at the same time. For example,one process could continuously extract transactional data changes and stream them to a decision-support database, while another process performs batch extracts for periodic reporting.
Or, two Extract processes could extract and transmit in parallel to two Replicat processes (with two trails) to minimize target latency when the databases are large. To differentiate among different processes, we can assign each one a group name.

Extract can be configured in two ways :-

- Initial Loads :- For initial data loads, Extract extracts a current set of data directly from their source objects.

- Change Synchronization :- To keep source data synchronized with another set of data,Extract extracts transactional changes made to data (inserts, updates, and deletes) after the initial synchronization has taken place. DDL changes and sequences are also extracted, if supported for the type of database being used.

Extract obtains the data from a data source in one of the following ways :-

- Database Transaction Logs :- (such as the Oracle redo logs or SQL/MX audit trails) This method is known as log-based extraction. When Extract is installed as a log-based implementation, it can read the transaction logs directly.

- GoldenGate Vendor Access Module (VAM) :- VAM is a layer for communication that passes data changes and transaction metadata to the Extract process. The database vendor provides the components that extract the data changes and pass it to Extract.

2) Data Pump :-

- Data pump is a secondary Extract group within the source GoldenGate configuration.If a data pump is not used, Extract must send data to a remote trail on the target.
- If we are using a configuration that includes a data pump,the primary Extract group writes to a trail on the source system.The data pump reads this trail and sends the data through the network to a remote trail on the target.
- Data pump adds the flexibility of storage and help to eliminate the load on the primary Extract process from TCP/IP activity.

Like a primary Extract group, a data pump can be configured in two modes :-

- Online or Batch processing :- Can perform data filtering, mapping, and conversion.

- Pass-through mode :- Data is passively transferred as-it is, without any manipulation.It increases the throughput of the data pump as the functionality of that looks up object definitions is bypassed.

In most business cases, it is best practice to use a data pump.

Some reasons for using a data pump include the following :-

- Protection against network and target failures:- In a basic GoldenGate configuration,with only a trail on the target system,there is no place on the source system to store data that Extract process continuously extracts into memory. If becuase of any reason the network or the target system becomes unavailable, the primary Extract could run out of memory and abend.
However,with a trail and data pump on the source system,captured data can be moved to disk,preventing the abend.When connectivity is restored,the data pump extracts the data from the source trail and sends it to the target system(s).

- Several phases of data filtering or transformation :- When using complex filtering or data transformation configurations, you can configure a data pump to perform the first transformation either on the source system or on the target system,and then use another data pump or the Replicat group to perform the second transformation.

- Consolidating data from many sources to a central target :- When synchronizing multiple source databases with a central target database, you can store extracted data on each source system and use data pumps on each of those systems to send the data to a trail on the target system. Dividing the storage load between the source and target systems reduces the need for massive amounts of space on the target system to accommodate data arriving from multiple sources.

- Synchronizing one source with multiple targets :- When sending data to multiple target systems, you can configure data pumps on the source system for each target. If network connectivity to any of the targets fails, data can still be sent to the other targets.

3) Replicat Process :-

- Replicat process runs on the target system. Replicat reads extracted data changes and DDL changes (if supported) that are specified in the Replicat configuration, and then it replicates them to the target database.

Replicat process can be configured in one of the following ways:-

- Initial loads: For initial data loads, Replicat can apply data to target objects or route them to a high-speed bulk-load utility.

- Change synchronization: To maintain synchronization, Replicat applies extracted transactional changes to target objects using native database calls, statement caches,and local database access. Replicated DDL and sequences are also applied, if supported for the type of database that is being used. To maintain data integrity, Replicat applies the replicated changes in the same order as those changes were committed to the source database.


- You can use multiple Replicat processes with multiple Extract processes in parallel to increase throughput.Each set of processes can handle different objects.To differentiate among processes, you assign each one a group name.
- You can delay Replicat so that it waits for a specific amount of time before applying data to the target database.A delay may be useful for such purposes to prevent the propagation of bad SQL, to control data arrival across different time zones, and to allow time for other planned events to
occur.DEFERAPPLYINTERVAL parameter can be used for controlling length of the delay.

4) Trails :-

- Trail is a series of files to store the supported database changes temporarily on disk to support the continuous extraction and replication.
- It can exist on the source or target system, or on an intermediary system, depending on how you configure GoldenGate.
- On the local system it is known as an extract trail (or local trail). On a remote system it is known as a remote trail.
- By using a trail for storage, GoldenGate ensures data accuracy and fault tolerance.
- The use of a trail is that it allows extraction and replication activities to occur independently of each other.
- With these processes separated,you have more choices for how data is delivered. For example, instead of extracting and replicating changes continuously, you could extract changes continuously but store them in the trail for replication to the target later, whenever the target application needs them.
- Only one Extract process can write to a trail.

Processes that read the trail are :-

- Data-pump Extract: Extracts data from a local trail for further processing,and transfers it to the target system or to the next GoldenGate process downstream in the GoldenGate configuration.

- Replicat: Reads a trail to apply change data to the target database.


For information on other components please read another topic.

Monday, November 2, 2009

GoldenGate Supported Topologies


1) Uni-Directional :- This topology can be used to create a reporting instance out of OLTP databases or to offload the reporting on OLTP or Production database.

2) Bi-Directional :- Can be used for Active-Active Instant failover.For example,If we want to apply patch on one database we can use another for our application like rolling upgrade in Oracle Real Application Clusters.

3) Peer-To-Peer :- Used in the case of High Availability and Load Balancing.High Availability mean if any of the database fails because of any reason(Hardware Failure,Disk Failure or Instance Failure) our application would not get affected becuase other two databases will be up and running.Other benefit is that load is also being shared between the databases equally.

4) Broadcast :- Used for Data Distribution.If we have Production database and we want to do different kind of things (reporting,testing and development)on the data being stored .Then we can distribute the data between same or different databases and can be used for different purposes mentioned above.

5) Consildation :- If want to create common datawarehouse by consolidating the data from the datamarts of various departments in the enterprise.

6) Cascading :- Can be used for Scalability and Database Tiering.If want the move the production database to testing database and then to move the results of testing into various other databases of other departments.We can use any of the above topologies in any manner to do cascading like in the diagram is Uni-directional and then Broadcasting is used.

GoldenGate Features and Capabilities

Oracle acquired GoldenGate on September 3,2009.
GoldenGate enables the exchange and manipulation of data at the transaction level among multiple, heterogeneous platforms across the enterprise.

GoldenGate Features and Capabilites :-
1) Filtering :- Gives the flexibility to select and replicate the desired amount of data from the source(s) that could be Database(s),Flat files,File systems,Datawarehouse,etc.

2) Transformation :- Gives the capability to move the data between two different kind of databases like between SQL Server and Oracle,IBM DB2 and Oracle by transformation.

3) Custom Processing :- Allows to perform complex mappings and to use Ibuild selective functions for processing.Gives the option for scheduling also.

4) Real-Time :- Log-based capture capability allows to move thousands of transactions per second with very low impact.

5) Heterogenous :- Allows to move changed data accross different databases and platforms.

6) Transactional :- Can work in transactional environments as well by maintaining the transactional integrity.

7) Performance :- More performance because of Log-based capture.

8) Extensibility and Flexibility :- Its open and modular architecture allows to extract and replicate selected data records, transactional changes, and changes to DDL across a variety of topologies.

9) Reliability :- It is resilient against failures and interruptions by maintaining checkpoints,trails and logs.

Wednesday, September 23, 2009

Advantages of Oracle Data Integrator (E-LT) over other ETL tools

1) Faster and simpler development and maintenance :- The declarative rules driven approach to ETL greatly reduces the learning curve of the product and increases developer productivity while facilitating ongoing maintenance. This approach separates the definition of the processes from their actual implementation, and separates the declarative rules (the “what”) from the data flows (the “how”).

2) Ensures Data Quality :- Faulty data is automatically detected and recycled before insertion into the target application with the help of data integrity rules and constraints defined both on the target application and in Oracle data Integrator.

3) Better Performance :- As ODI is an E-LT tool it takes the advantage of set based level data transformation execution.And traditional ETL tool they do row by row data transformations.

4) Simple and efficient architecture :- ETL hub server is not needed in this between source and the target server.It uses target server RDBMS engine to perform complex transformations, most of which happen in batch mode when the server is not busy processing end-user queries.

5) Platform Independence :- Oracle Data Integrator supports all platforms, hardware and OSswith the same software.

6) Data Connectivity :- Supports all RDBMSs including all leading Data Warehousing platforms such as Teradata, IBM DB2, Netezza, Oracle, Sybase IQ and numerous other technologies such as flat files, ERPs, LDAP, XML.

7) Cost-savings :- Elimination of the ETL hub server and ETL engine reduces both the initial hardware and software acquisition and maintenance costs.

Thursday, April 23, 2009

Installation and Configuration of ILM:-(Partitioning)

For Installing database,go to setup.exe and double click on it :-


Click on Run :-


Select the Advanced Installation type for Installation Method :-


Select Enterprise Edition for type of Installation :-

Keep the name of Oracle Home same but change the path of installation of oracle database according to the space in the drive :- (For example I have selected D: drive)

Select the configuration Option Create database :-


Select the Database Configuration as General Purpose :- (Can select other options as well depending on the requirement)

It will automatically take the Global Database Name as orcl and the Database Character Set also,we need not to change these two parameters :-

Check the option Create database with sample schemas :-

Keep the option Database Control for Database Management :-

Select File System as Database Storage Option :- (We can select ASM also according to the environment)


We can select any of the options for Enabling and Disabling of Automated backups,but here in this case select the option Do not enable Automated Backups :-

We can specify different passwords for different accounts but here we are giving same password for all accounts :-

Add Image
Click on the Install option :-


Click on ok :-


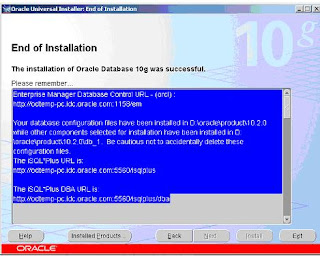
Copy the information somewhere mentioned about Oracle Enterprise Manager and click on exit:-


Automatically after exiting from the installation the Oracle Database Control will open :-


Give the Username as SYS,Password as given at the time of Installation and Connect as SYSDBA :-


After clicking on Login,Oracle Database 10g Licensing Information will come and we need to select the option I agree if we are licensed for Database Diagnostic,Tuning and Configuration Management Pack.


Now,we need to install HTTP Server as well for Installing Application Express which is used for ILM Console.HTTP Server download we can get from thee Companion CD of Oracle Database 10g.


Click on setup.exe :-


Select the option Oracle Database 10g Companion Products 10.2.0.1.0 because only HTTP Server is needed :-


Select the Path depending on the space in the drives but the HTTP Server home should be separate from Oracle Database Home :-


Select the Apache Standalone option and click on Next :-


Save the Information about the HTTP server :-


Installation of Application Express :-

Checking the shared_pool_size of the Target Database :-
Enter the following command to determine whether the system uses an initialization parameter file (initsid.ora) or a server parameter file (spfiledbname.ora):-


Determine the current values of the shared_pool_size parameter :-


If the system is using a server parameter file, set the value of the SHARED_POOL_SIZE initialization parameter to at least 100 MB:-

If the system uses an initialization parameter file, change the values of the SHARED_POOL_SIZE parameter to at least 100 MB in the initialization parameter file (initsid.ora) :-

Before Installing Oracle Application Express, Oracle recommends that you complete the following steps :-
1. Shut down any existing Oracle Database instances as well as Oracle-related processes.
Shut down any existing Oracle Database instances with normal or immediate priority, except for the database where you plan to install the Oracle Application Express schemas. On Real Application Clusters (RAC) systems, shut down all instances on each node.
If Automatic Storage Management (ASM) is running, shut down all databases that use ASM except for the database where you will install Oracle Application Express, and then shut down the ASM instance.

You can use the Windows Services utility, located either in the Windows Control Panel or from the Administrative Tools menu (under Start and then Programs), to shut down Oracle Database and ASM instances. Names of Oracle databases are preceded with OracleService. The Oracle ASM service is named OracleASMService+ASM. In addition, shut down the OracleCSService service, which ASM uses. Right-click the name of the service and from the menu, choose Stop.

2. Back up the Oracle Database installation.
Oracle recommends that you create a backup of the current installation of Oracle Database installation before you install Oracle Application Express. You can use Oracle Database Recovery Manager, which is included the Oracle Database installation, to perform the backup.

3. Start the Oracle Database instance that contains the target database.
After backing up the system, you must start the Oracle instance that contains the target Oracle database. Do not start other processes such as the listener or Oracle HTTP Server. However, if you are performing a remote installation, make sure the database listener for the remote database has started. To start the database instance or listener, you can use the Windows Services utility.

To install Oracle Application Express release 3.0:

1. Download the file apex_3.0.zip from the Oracle Application Express download page. See:http://www.oracle.com/technology/products/database/application_express/download.html

2. Unzip apex_3.0.zip as follows, preserving directory names:
o UNIX and Linux: Unzip apex_3.0.zip
o Windows: Double click the file apex_3.0.zip in Windows Explorer

3. Change your working directory to apex.


Change the working directory where the apex folder exists and then connect to the database by SYS user :-


1. Run apexins.sql passing the following five arguments in the order shown:

@apexins password tablespace_apex tablespace_files tablespace_temp images

Where:
o password is the password for the Oracle Application Express administrator account, the Application Express schema owner, and the Application Express files schema owner.

The Application Express schema owner is the user or schema into which Oracle Application Express database objects will be installed. The Application Express files schema owner is the user or schema where uploaded files are maintained in Oracle Application Express.
o tablespace_apex is the name of the tablespace for the Oracle Application Express application user.
o tablespace_files is the name of the tablespace for the Oracle Application Express files user.
o tablespace_temp is the name of the temporary tablespace.
o images is the virtual directory for Oracle Application Express images. To support future Oracle Application Express upgrades, define the virtual image directory as /i/.

The following examples demonstrate running apexins.sql and passing these arguments:

@apexins password SYSAUX SYSAUX TEMP /i/


Copying the Images Directory :-

Copying the Images Directory in a New Installation :-

On Windows:
xcopy /E /I ORACLE_HOME\apex\images ORACLE_HTTPSERVER_HOME\Apache\images

Configuring Oracle HTTP Server 10g :-

Editing the dads.conf File :-

If this is a new installation of Application Express, you need to edit the dads.conf file. The dads.conf file contains the information about the DAD to access Oracle Application Express.
Use a text editor and open the dads.conf.
On Windows see: ORACLE_HTTPSERVER_HOME\Apache\modplsql\conf\dads.conf


In the dads.conf file, replace ORACLE_HTTPSERVER_HOME, host, port, service_name, and apex_public_user_password with values appropriate for your environment. Note that the apex_public_user_password is the password you defined when you installed Oracle Application Express.


Change mgr to manager :-


Stopping and Restarting Oracle HTTP Server :-

· ORACLE_HTTPSERVER_HOME\opmn\bin\opmnctl stopproc ias-component=HTTP_Server

· ORACLE_HTTPSERVER_HOME\opmn\bin\opmnctl startproc ias-component=HTTP_Server

Go to link
http://odtemp-pc.idc.oracle.com:7777/pls/apex/apex_admin to access application express console :-


Installation of ILM :-

Download the ILM Assistant from :-
http://www.oracle.com/technology/software/deploy/ilm/index.html

Extract the ILM Assistant V1.3.exe into a new folder which is named as ILMA here.
Go to command prompt and change the directory to place where we have the ILMA folder :-


Connect to database through SYS user :-


Run the script :-
SQL> @ilma_install apex_password tablespace connect

Where :-
Apex_password is the password of application express schema owner (FLOWS_nnnnnnn).
Note :- apex_password is the initial password assigned to the following users created by this installation :-
The Oracle user ILM_TOOLKIT into which ILM Assistant database objects are installed.
The ADMIN user for application express workspace ILM_TOOLKIT.
Tablespace is the tablespace in which to store ILM Assistant database objects created by this installation.
Connect is the Oracle Net connect string to the database. If this is local install,use none or NONE.
For Example :- SQL> @ilma_install MY_APEX_PWD ILM_ASSISTANT none


After successfully executing the installation script,a required post installation script must be executed.The purpose of this script is to prepare any internal caching tables for use by ILM Assistant :-
SQL> @ilma_post_install


Run ILM Assistant using a browser by navigating to a link :-
http://odtemp-pc.idc.oracle.com:7777/pls/apex/f?p=737677